
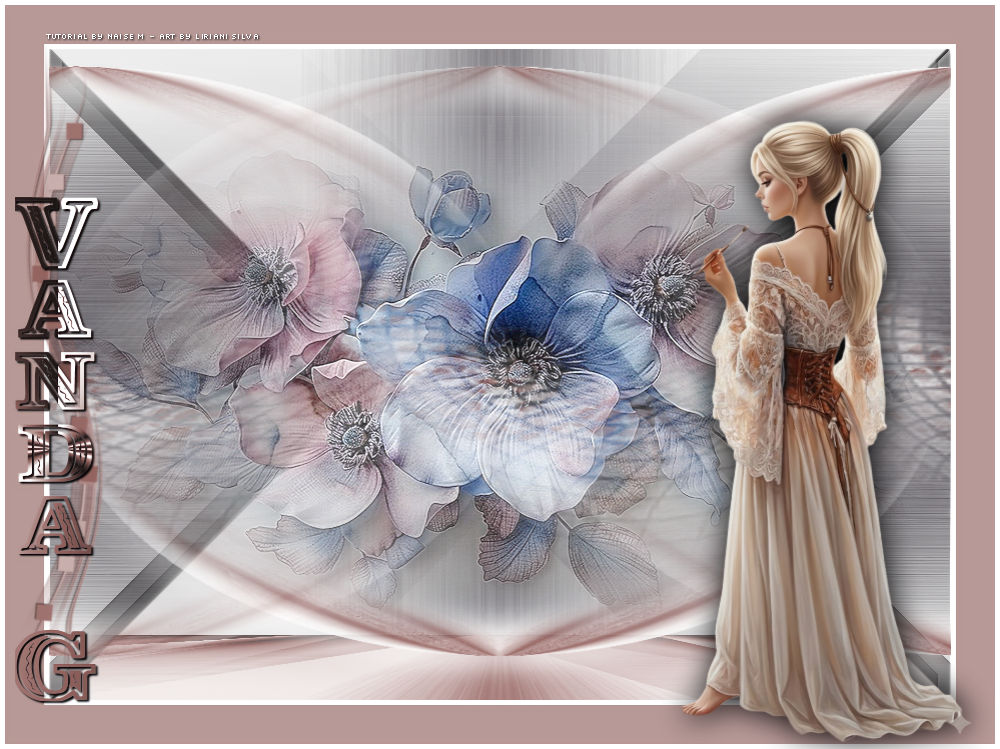
This tutorial was translated with permission from NaiseM.
With affection and gratitude to the author, I am happy to translate and share this lovely tutorial.


*Original Tutorial*

MATERIAL

Tube: tube
Floral misted: misted_floral
Title: titulo
Selection: #select_vandag
Deco: decor_nmcriacoes_87
PLUGINS
Mehdi → Wavy Lab 1.1
Filters Unlimited 2.0 → VM Toolbox → Blast
Filters Unlimited 2.0 → &<Bkg Kaleidoscope> → @BlueBerry Pie
Filters Unlimited 2.0 → Toadies → What Are You?
FM Tile Tools → Blend Emboss
MuRa's Filter Meister → Perspective Tiling 1.1
Credits
Tube, misted, deco, selection and title: NaiseM
A little gift for this dear friend.
All tutorials are personal. Any resemblance is purely coincidental.
Tutorial created by the Author in PSP 2020.
My version made in PSP 2022.
 |
This arrow marks your lineClick and drag to move it |
TUTORIAL
Colors used in this Tutorial
Foreground: #ffffff
Background: #363138

1_. Set the Foreground color to #ffffff and the Background color to #363138
2_. Open a new transparent image of 900 x 650 pixels
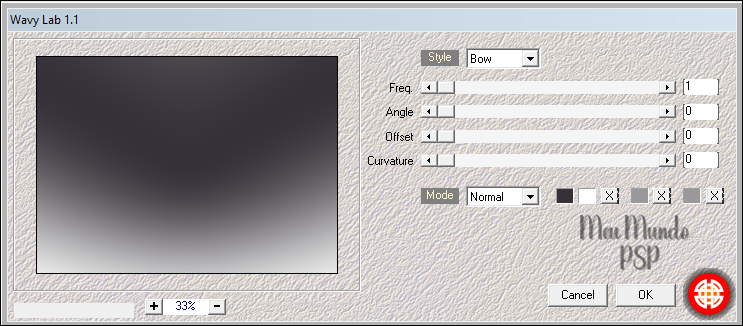
3_. Plugins → Mehdi → Wavy Lab 1.1, with the settings below:
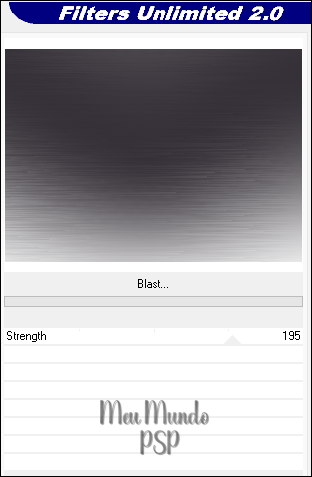
4_. Plugins → Filters Unlimited 2.0 → VM Toolbox → Blast, with the settings below:
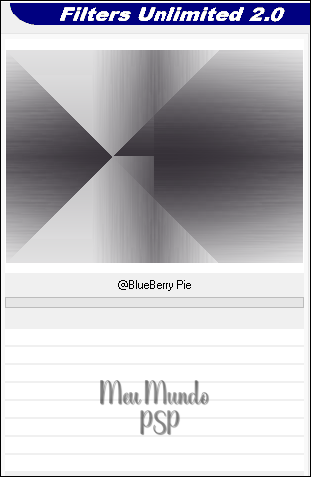
5_. Plugins → Filters Unlimited 2.0 → &<Bkg Kaleidoscope> → @BlueBerry Pie, with the settings below:
6_. Layers → Duplicate
7_. Image → Mirror → Mirror Horizontal
Layers → Properties → Blend Mode: Soft Light
Layers → Merge → Merge Visible
8_. Selections → Load/Save Selection → Load Selection From Disk: "#select_vandag"
Selections → Promote Selection to Layer
9_. Plugins → Filters Unlimited 2.0 → Toadies → What Are You?: Default
10_. Plugins → FM Tile Tools → Blend Emboss
Selections → Select None
11_. Layers → Duplicate
12_. Image → Mirror → Mirror Horizontal
Layers → Merge → Merge Down
Effects → 3D Effects → Drop Shadow: 2 / 2 / 100 / 2,00 / Color = #000000 (black)
Repeat the Drop Shadow with: -2 / -2 / 100 / 2,00 / Color = #000000 (black)
13_. Open the misted "misted_floral"
Edit → Copy
Go back to your work
Edit → Paste As New Layer
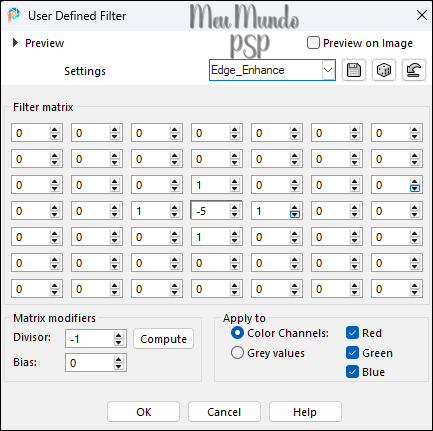
Effects → User Defined Filter → Edge_Enhance, with the settings below:
14_. Layers → New Raster Layer
Selections → Select All
15_. Open the deco "decor_nmcriacoes_87"
Edit → Copy
Go back to your work
Edit → Paste Into Selection
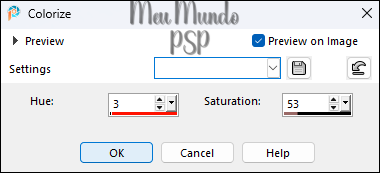
Adjust → Hue and Saturation → Colorize, with the settings below:
Selections → Select None
16_. Activate the Layer → Merged
Layers → Duplicate
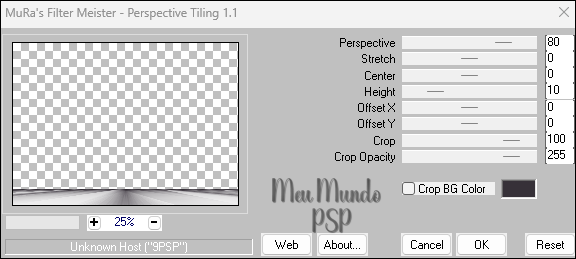
17_. Plugins → MuRa's Filter Meister → Perspective Tiling 1.1, with the settings below:
Adjust → Hue and Saturation → Colorize, with the same settings
18_. Image → Add Borders → Symmetric checked
5px color: #ffffff
39px color: #b79997
5px color: #ffffff
19_. Open the "titulo"
Edit → Copy
Go back to your work
Edit → Paste As New Layer
Pick Tool - Position X: 15,00 - Y: 33,00
Press the M key to deactivate the Pick Tool.
20_. Open the "tube"
Edit → Copy
Go back to your work
Edit → Paste As New Layer
Pick Tool - Position X: 679,00 - Y: 119,00
Press the M key to deactivate the Pick Tool.
Effects → 3D Effects → Drop Shadow: 1 / 1 / 100 / 47,83 / Color = #000000 (black)
21_. Add the credits.
22_. Add your Signature
Save as JPEG.
Send your version Here.

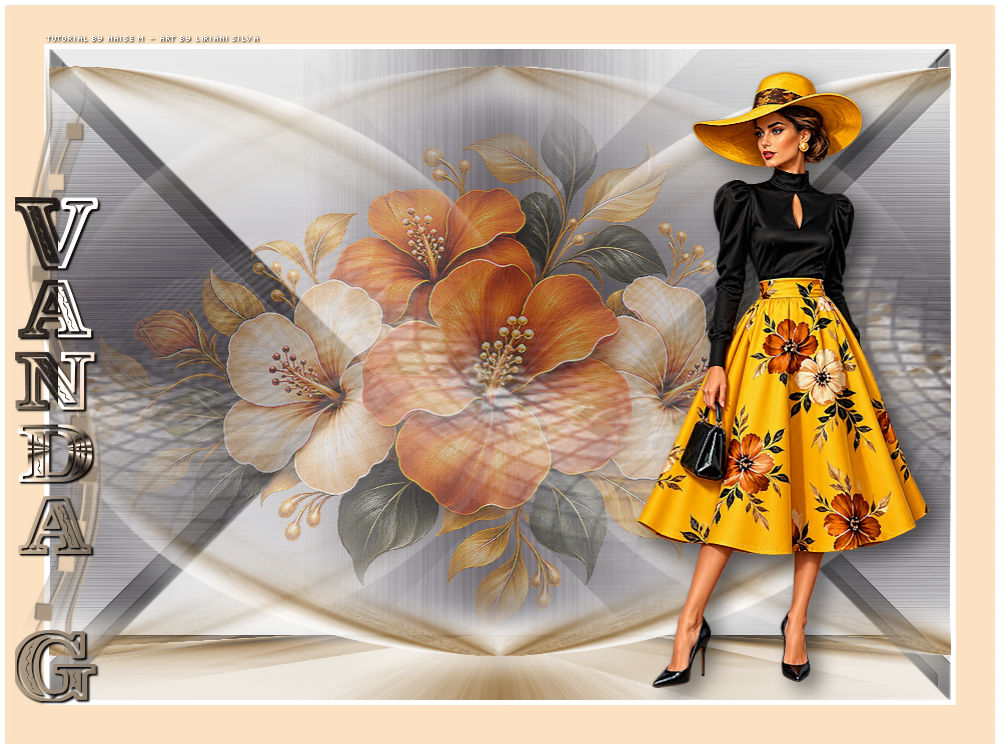
My Version
Credits
Character and vase tubes:
Liriani Silva
Materials provided by the Author.
Translation Liriani Silva
06/11/2026